| Table of Contents |
|---|
| Note |
|---|
Be advised: Epic templates with child issues are available on Easy Templates for Jira Cloud only |
Jira Cloud Instructions
You need to have a Jira issue created first so then you can save it as Template
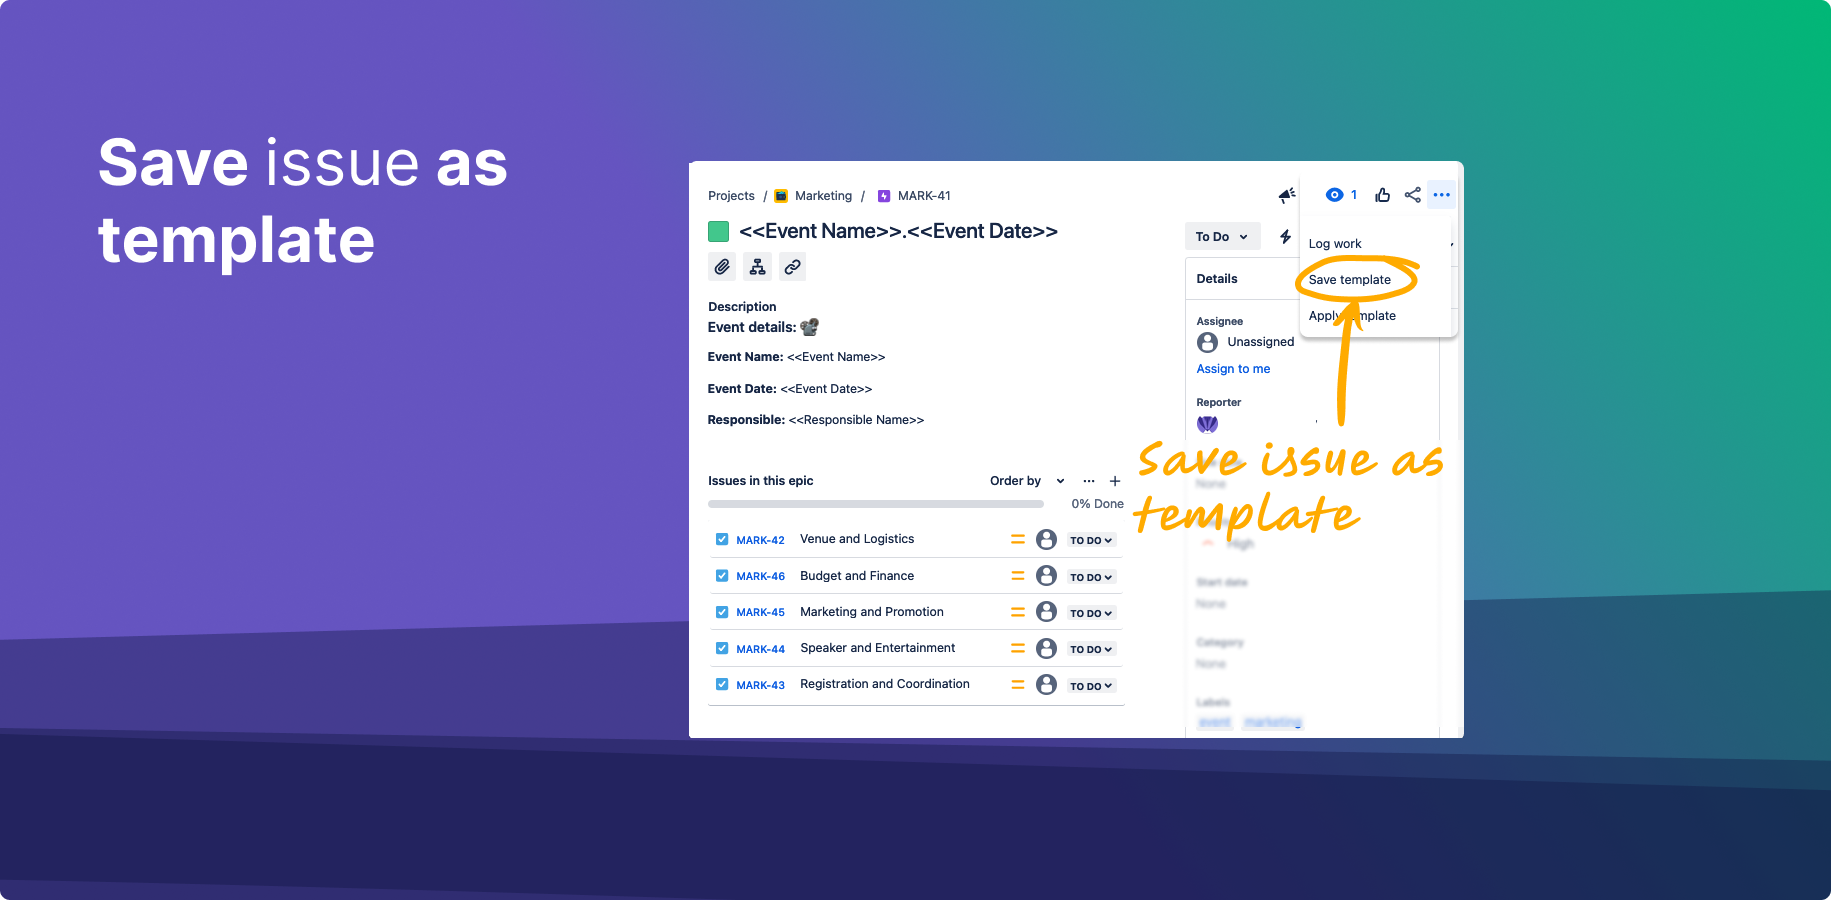
Go to your Jira issue
Open top Right Menu
Click “Save Template”
...
Set Template Name
Click "Create"
...
A new Template will be created with a wide scope including
Summary
Description
Subtasks (if present) with own summary and descriptions
| Tip |
|---|
Read how you can define what template fields should be used during new issue creation and what should be ignored using Enabling template fields. Cloud feature |
...
Creating a Jira Issue Template is a straightforward process with the Easy Issue Templates for Jira app. This guide provides detailed instructions for Jira Cloud and Data Center users on how to save existing issues as templates, including setting the template scope and incorporating various fields.
| Table of Contents |
|---|
Jira Cloud Instructions
Part 1: Saving a Template from an Existing Issue
Start with an Existing Issue:
Ensure you have a Jira issue already created, as this will form the basis of your new template.
Access the Save Template Feature:
Navigate to your selected Jira issue.
Open the top right menu by clicking on the "•••" (More) icon.
Select “Save Template” from the dropdown menu.
Configure the Template:
Set the template name in the prompted field.
Click "Create" to save the template.
This new template will include the issue's summary, description, and any subtasks (with their summaries and descriptions).
Part 2: Creating a Template from an Existing Jira Issue
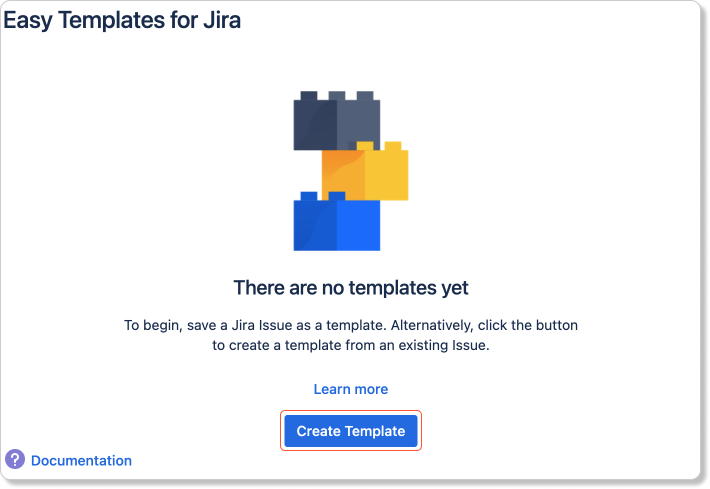
Find the Create Template Button:
The “Create template” button is available in various locations including:
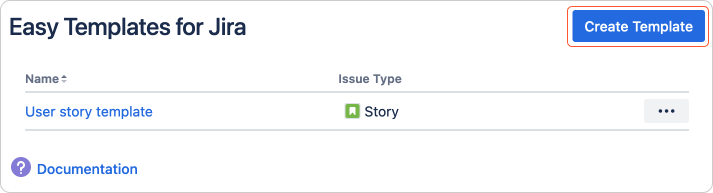
Manage Templates screen.
Create from template popup (zero-state).
Apply issue popup (zero-state).
Get Started page.
Create the Template:
Click “Create Template” in any of the above locations.
Select a Jira issue as the source for your template.
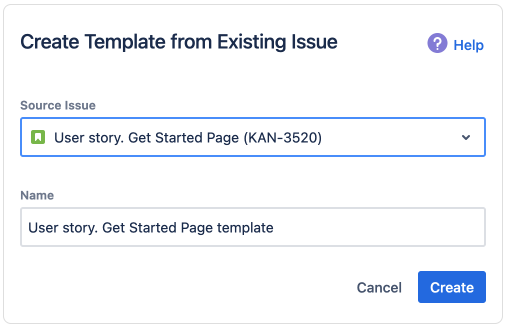
Set a name for your template.
Click “Create” to finalize the new template. 🎉
Understanding Template Scope
The created templates will have a broad scope, capturing essential elements of the issue. For more detailed control over which fields are included or excluded in your template, refer to the "Enabling template fields" feature in Jira. https://help.appliger.com/easy-templates-for-jira/enabling-template-fields-cloud
Check Video
https://www.youtube.com/watch?v=AaCNAomU2fw
| Widget Connector | ||||||||||
|---|---|---|---|---|---|---|---|---|---|---|
|
Jira Server and Data Center Instructions
You need to have a Jira issue created first so then that you can save it as a Jira Template
Go to your Jira issue
Open "More" Menu
Click “Save as Template”
...
Set Template Name
Click "Create"
...
| Info |
|---|
You can choose fields to be saved with Template. While issue creation they will be auto-populated. |
...
KNOWN ISSUE. Jira Server
...
Then use your saved Jira issue template for new issue creation! 🚀
Conclusion
By following these steps, you can efficiently create Jira Issue Templates in Jira with Easy Templates app, enhancing your project management and workflow automation. These templates can save time and ensure consistency across similar tasks and issues.
Additional Resources
Enabling Template Fields: Learn how to define what template fields should be used during new issue creation and what should be ignored.
Support Material: Check out the instructional video on creating templates.
By utilizing these features, you can tailor your Jira environment to better suit your project management needs, ensuring a more streamlined and efficient workflow.
...
| Insert excerpt | ||||||
|---|---|---|---|---|---|---|
|